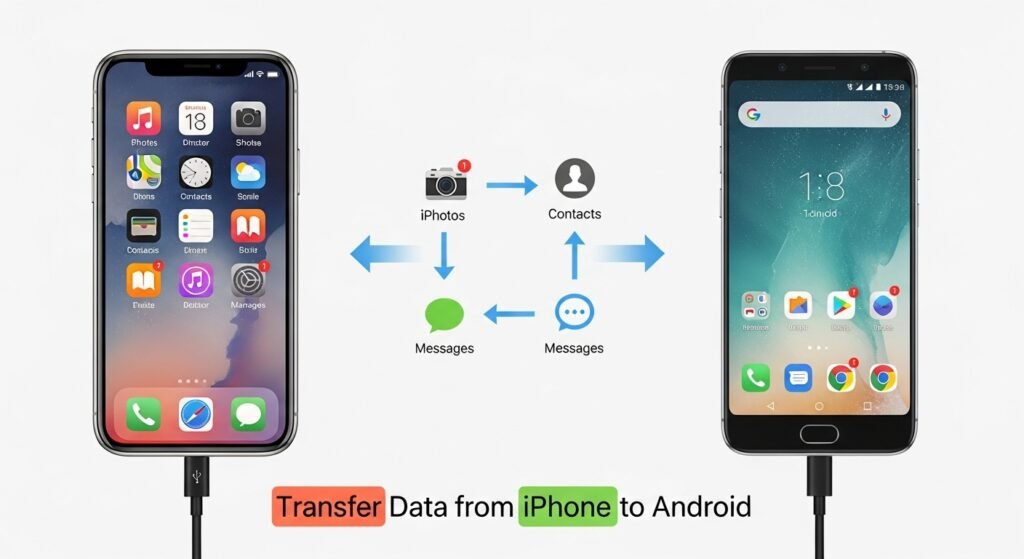
Making the switch from iPhone to Android is an exciting decision, but the prospect of leaving behind years of photos, contacts, messages, and other data can feel daunting. Fortunately, transferring your iPhone data to Android has never been easier—Google and various manufacturers have created multiple methods to seamlessly move your information, whether you’re switching during setup or after your Android device is already configured. This comprehensive guide walks you through every practical method for transferring contacts, photos, videos, messages, music, calendar events, and app data, ensuring you don’t lose anything important during your transition.
Understanding Your Transfer Options
Before diving into specific methods, understand the types of data you can transfer and the various pathways available. During Setup (most seamless): If you’re transferring immediately when setting up your new Android device, the process is most streamlined with manufacturer apps and Google’s official tools.
After Setup: If your Android device is already configured, you’ll use cloud-based services or third-party apps to move data retroactively.
Data Types: Most methods transfer contacts, photos, videos, calendar events, text messages (SMS and MMS), call logs, and notes—though some exclude certain data types.
Important Consideration: iMessage and Apple-exclusive features don’t transfer directly; you’ll need to disable iMessage before switching to ensure text message delivery works properly on Android.
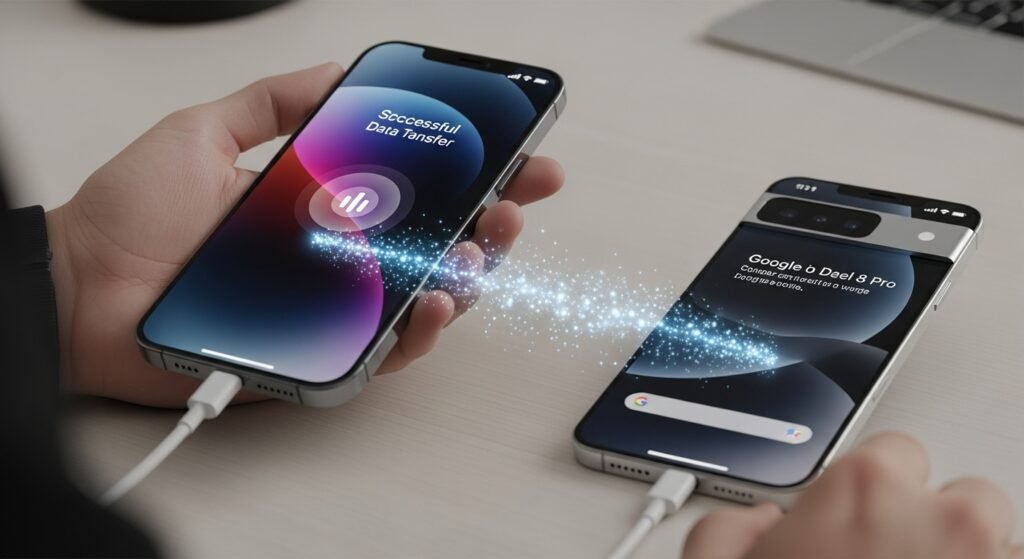
Method 1: Google’s “Switch to Android” App – The Official Approach
Google provides the “Switch to Android” app, specifically designed to transfer data from a Phone to Android, making it Google’s official solution for the migration process.
What You Can Transfer:
- Contacts
- Photos and videos
- Calendar events
- SMS, MMS, and iMessage texts
- WhatsApp chats
- Free apps available on the Google Play Store
- Call logs
- Notes
Requirements:
- iPhone running iOS 12.3 or later
- Brand new or factory-reset Android device during setup
- USB cable with appropriate connectors (Lightning to USB-C or USB-A)
- Alternatively, a WiFi connection for wireless transfer (though wired is more reliable)
Step-by-Step Guide for Wired Transfer (Recommended):
Step 1: Disable iMessage
Before transferring, disable iMessage on your iPhone to prevent message delivery issues:
- Open Settings > Messages
- Toggle off iMessage
Step 2: Download the App
- On your iPhone, open the Apple App Store
- Search for “Switch to Android“
- Download and tap Open
Step 3: Begin the Transfer
- Accept the terms and select Copy Data
- Allow necessary permissions
Step 4: Start Android Device Setup
- Turn on your new Android device
- Follow setup prompts until reaching the Copy Apps & Data page
- Tap Next three times to proceed
Step 5: Connect Devices
- Connect your iPhone to your Android device using a USB cable with appropriate adapters.
- Tap Trust on your iPhone when prompted
- On the Android device, tap Next
Step 6: Sign in to your Google Account
- Enter your Google account credentials when prompted
- Tap Next after signing in
Step 7: Select Data to Copy
- Choose which data types to transfer (contacts, photos, messages, etc.)
- Tap Copy and let the process complete.
The wired method transfers nearly all data types, while wireless transfers are limited to contacts, photos/videos, and calendar events.
Advantages:
- Official Google solution—optimized and reliable
- Can transfer apps (unique advantage)
- Secure, encrypted process
- No third-party involvement
Disadvantages:
- Only works during initial Android setup or factory reset
- Requires a USB cable with proper connectors
- The wireless option has limited data type support
Method 2: Samsung Smart Switch – For Galaxy Users
If you’re switching to a Samsung Galaxy or Note device, Samsung’s proprietary Smart Switch app streamlines the process specifically for Samsung devices.
Data Smart Switch Can Transfer:
- Contacts
- Photos
- Music
- Videos
- Messages
- Notes
- Calendars
Step-by-Step Guide:
Step 1: Download Smart Switch
- Visit the Samsung website or search “Smart Switch” on your iPhone
- Download the iOS version
Step 2: Set Up Your Samsung Device
- Turn on your new Samsung phone
- During setup, select Transfer Data when prompted
Step 3: Launch Smart Switch
- Open the Smart Switch app on your iPhone
- Follow on-screen prompts to connect to your Samsung device
Step 4: Select Data
- Choose the data types you want to transfer
- Confirm and let the process complete
Advantages:
- Optimized specifically for Samsung devices
- Comprehensive data transfer
- Samsung support if issues arise
Disadvantages:
- Limited to Samsung devices
- May require a factory reset of the Samsung phone
Method 3: MobileTrans – Third-Party Desktop Solution
For users wanting maximum flexibility and comprehensive data transfer options, MobileTrans is a desktop application handling iPhone-to-Android transfers with extensive customization.
Data MobileTrans Can Transfer:
- Contacts
- Messages
- Photos
- Videos
- Music
- Calls logs
- Notes
- Calendar events
- Apps and more
Advantages:
- Comprehensive data type support—transfers 10+ data types
- Works on already-set-up devices
- Maintains 100% photo quality
- Encrypted transfer with no server storage
- Works with all Android and iPhone models
- Also backs up data for safety
Disadvantages:
- Premium software with paid versions
- Requires a computer with USB cables
- Learning curve compared to native solutions
Step-by-Step Guide:
Step 1: Download and Install
- Visit the MobileTrans website
- Download for your operating system (Windows or Mac)
- Install on your computer
Step 2: Connect Devices
- Connect both the iPhone and the Android to your computer via USB
- Launch MobileTrans
Step 3: Select Transfer Mode
- Click Phone Transfer from the main menu
- Select Phone to Phone
- Specify iPhone as the source and Android as the destination
Step 4: Choose Data
- Review the supported data types in the middle section
- Check boxes next to the data you want to transfer
Step 5: Start Transfer
- Click Start
- Wait for the process to complete
- Review the transfer report to confirm all data transferred
Method 4: Google Drive – Cloud-Based Backup
Google Drive provides a straightforward cloud-based approach for transferring specific data types without special apps or cables.
What Google Drive Transfers:
- Contacts (via Google Contacts backup)
- Photos and videos
- Calendar events
- Documents and files
Note: Google Drive doesn’t directly transfer messages, apps, or music, making it better suited for supplementary backup rather than comprehensive migration.
Step-by-Step Guide:
Step 1: Backup on iPhone
- Open the Google Drive app on your iPhone
- Tap your profile icon in the top-left
- Select Settings > Backup
- Choose data types to back up (contacts, photos, calendar, etc.)
- Tap Start Backup
Step 2: Wait for Backup Completion
Backup times vary by data volume—gigabytes of photos may take hours.
Step 3: Access Data on Android
- Set up your new Android device
- Sign in to the same Google account used for backup
- Contacts sync automatically
- Access the Google Photos app to view backed-up photos
- Calendar events appear in Google Calendar
Advantages:
- Completely free
- No cables or adapters needed
- Data is accessible even without the old device
- Works for already-set-up Android devices
Disadvantages:
- Doesn’t transfer messages or apps
- Slow for large photo libraries
- Requires sufficient Google Drive storage
Method 5: Google Photos – Simplified Photo Transfer
If photos are your primary concern, Google Photos provides the simplest dedicated solution.
Step-by-Step Guide:
Step 1: Install on iPhone
- Download Google Photos from the App Store
- Open the app and sign in to your Google account
Step 2: Backup Photos
- Tap your profile icon
- Select Settings > Backup
- Choose backup quality (Original, High, Storage Saver)
- Tap Backup Now or enable automatic daily backups
Step 3: Access on Android
- Download Google Photos on your Android device
- Sign in to the same Google account
- All backed-up photos and videos appear automatically
Advantages:
- Completely free with unlimited storage (with compression)
- Simple, intuitive process
- Syncs across all devices automatically
- Preserves original quality if desired
Disadvantages:
- Only transfers photos and videos
- Original quality backup requires es Google One subscription
Method 6: iCloud and Gmail for Contacts
For contacts specifically, iCloud and Gmail offer straightforward transfer methods.
Via iCloud:
- On your iPhone, open iCloud.com in a web browser
- Sign in to your iCloud account
- Click Contacts
- Press Ctrl+A (or Cmd+A on Mac) to select all
- Click the gear icon and select Export vCard
- Save the .vcf file
Step 2: Import to Android
- On your new Android device, open Google Contacts (contacts.google.com)
- Click Import
- Select the .vcf file
- Choose which Google account to import into
- Click Import
Advantages:
- Free and straightforward
- Works with any email service
- Preserves all contact details
Disadvantages:
- Manual process with multiple steps
- Only transfers contacts
Disabling iMessage Before Switching
Critical step: Disable iMessage on your iPhone before switching to Android, or you won’t receive text messages from other iPhone users sending iMessages.
How to Disable iMessage:
- Open Settings on your iPhone
- Navigate to Messages
- Toggle off iMessage
iMessages sent to your phone number after disabling will convert to SMS and reach your Android device.
Timing: Some users recommend disabling iMessage 24-48 hours before the switch to allow time for Apple’s servers to update.
Transferring App Subscriptions and Purchases
Not all app subscriptions transfer automatically.
Cross-Platform Subscriptions (work on both iOS and Android):
- Netflix
- Spotify
- Amazon Prime Video
- Microsoft services
- Adobe Creative Cloud
Simply signintoo these apps on your Android device using the same account.
Apple-Exclusive Services (do NOT transfer):
- Apple Music (though premium features work if you subscribe)
- Apple TV+
- Apple Arcade
- Apps purchased exclusively through Apple
Important: Cancel unwanted Apple app subscriptions before switching to avoid continued charges. Many apps offer cross-platform subscriptions through third-party services—contact app developers to confirm.
Transferring Music
Apple Music: Sign in to Apple Music on your Android device; your library and playlists sync automatically.
Purchased Music from iTunes:
- Download iTunes-purchased music to your computer
- Use a desktop app like iTunes or Spotify to transfer playlists
- Alternatively, subscribe to Spotify or Apple Music to access your music library
Local Music Files:
Connect your Android to your computer and manually copy music files via USB, or use cloud storage services like Google Drive or Dropbox.
Managing Messages
SMS/MMS Messages: Transfer using Switch to Android or third-party apps like MobileTrans.
WhatsApp Chats: Google’s Switch to Android transfers WhatsApp conversations.
iMessage Conversations: Don’t transfer directly to Android—you’ll need third-party apps or manual methods. Most users simply start fresh with Android messaging.
Preparation Checklist
Before switching, prepare your iPhone:
- Back up your device: Use iCloud or iTunes for safety
- Write down credentials: App passwords, login information
- Screenshot home screens: Reference for downloading Android equivalents
- Check storage: Ensure sufficient space on Android
- Disable iMessage: Prevent text message delivery issues
- Prepare cables: Have appropriate USB cables available
- Charge devices: Ensure both phones are fully charged
- Free time: Set aside 1-2 hours for the process
- Document subscriptions: Note active subscriptions for cancellation
Troubleshooting Common Transfer Issues
Data Not Transferring:
- Ensure devices remain connected throughout the process
- Verify sufficient storage on the Android device
- Try a wired connection instead of WiFi
- Restart both devices and try again
Partial Data Transfer:
- Check transfer logs for errors
- Retry transfer for specific data types
- Use alternative methods for problematic data
Missing Photos:
- Verify backup completed in Google Photos
- Check if photos are synced to the Google Account
- Use manual USB transfer as backup
Messages Not Showing:
- Confirm SMS/MMS messages transferred (not iMessages)
- Allow time for background sync to complete
- Manually open the messaging app to trigger sync
Conclusion
Transferring data from iPhone to Android is straightforward using Google’s official Switch to Android app, manufacturer solutions like Samsung Smart Switch, or comprehensive third-party tools like MobileTrans. Each method offers different advantages—native apps provide simplicity and reliability, while third-party solutions offer maximum flexibility and comprehensive data transfer.
The key to successful migration is preparation: disable iMessage, back up your data, gather necessary cables, and allocate sufficient time for the transfer process. Whether transferring during initial Android setup or after your device is configured, you have multiple reliable options ensuring your photos, contacts, messages, and other important data make the journey to Android without loss.
Start your transfer today using the method best suited to your situation, and confidently embrace your Android device knowing all your important information has safely switched along with you.